Cornstarch Chocolate Chip Cookies

It's no surprise that like most things, chocolate chip cookies are just so much better made from scratch. Just when you think you have the perfect recipe for the classic chocolate chip cookies, a new recipe shows up.
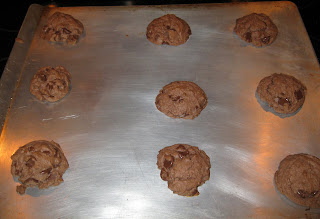
Lately, I have seen various recipes on Pinterest for chocolate chip cookies made with cornstarch that are supposed to be amazing! Today I decided to give them a try. I am a soft cookie person as opposed to a crunchy cookie person and these cookies promised to be soft and fluffy.
These cookies were very easy to make and as promised, they turned out soft. They are more of a cakey type cookie, which I love but if you prefer thin and crispy cookies then you may not care for these.
Cornstarch Chocolate Chip Cookies
Source: Sweet Pea's Kitchen via Pinterest
Ingredients:
2 teaspoons cornstarch
1 teaspoon baking soda
1/2 teaspoon salt
3/4 cup unsalted butter, softened
3/4 cup brown sugar
1/4 cup granulated sugar
1 egg
2 teaspoons vanilla extract
1 cup bittersweet chocolate chips
2 teaspoons cornstarch
1 teaspoon baking soda
1/2 teaspoon salt
3/4 cup unsalted butter, softened
3/4 cup brown sugar
1/4 cup granulated sugar
1 egg
2 teaspoons vanilla extract
1 cup bittersweet chocolate chips
2 cups all purpose flour
Directions:
Preheat the oven to 350°F. Line 2 cookie sheets with parchment paper.
In a medium bowl, flour, cornstarch, baking soda, and salt; set aside.
In the bowl of a stand mixer fitted with the paddle attachment, cream the butter and both sugars on medium speed until light and fluffy, about 2 minutes. Scrape down the sides of the bowl then add the egg and vanilla and beat until well combined. Add half of the flour mixture and mix for 15 seconds. Add the remaining flour mixture and beat until just incorporated. Fold in chocolate chips.
Drop by rounded tablespoons onto prepared baking sheet, leaving about 2 inches between them. Bake for 8-10 minutes or until barely golden brown around the edges. Let cookies cool on sheets for 5 minutes before transferring cookies to wire racks to cool completely.
Fudge Brownie Cupcakes with Cookie Dough Frosting

Picture Source: Sally's Baking Addiction
I found these cupcakes this morning and new I had to make them right away. I am so glad I did because I honestly think they are one of them best things I have ever made. Not only were they really quick and easy but they are so so so amazingly delicious! I followed the recipe exactly and although it says you can substitute your favorite brownie mix for the brownies, I honestly don't see why you would want to. The brownies are pretty quick to put together and they really are so tasty. The cookie dough frosting was really easy too and it tastes just like cookie dough! I will definitely be making this again. Next time though I think I will make these in mini muffin tins because they are so rich. Even I couldn't eat more than a few bites at a time. The recipe says it makes 10-12 cupcakes, I only got 8 cupcakes out of this recipe.
Fudge Brownie Cupcakes with Cookie Dough Frosting
Source: Sally's Baking Addiction
Ingredients
- 1/2 cup (1 stick) butter
- 3/4 cup packed brown sugar
- 1/2 cup cocoa powder
- 1/2 Tbsp vanilla extract
- 2 eggs
- 1/4 tsp salt
- 1/2 tsp baking powder
- 3/4 cup all-purpose flour
- cookie dough frosting (recipe below)
Instructions
- Preheat oven to 375 degrees. Line muffin tin with paper cups.
- Melt butter in the microwave in a large microwave safe bowl. Mix in the sugar until smooth and microwave for about 1 minute. Stir the mixture until smooth again. Whisk in the vanilla and eggs.
- In a seperate bowl, mix together the salt, baking powder, cocoa powder, and flour. Slowly add to the wet ingredients and stir until completely combined.
- Fill the muffin tins about 2/3 full. Bake in the prepared muffin tin for about 8-10 minutes (mine took a little under 9 minutes). Allow to cool completely before frosting.
Notes
*You could easily use boxed brownie mix as a shortcut, but you would need to adjust the frosting accordingly since the cookie dough frosting recipe below only makes enough for 10-12 cupcakes.
*Depending on how full you fill the muffin tins, you could get anywhere from 8-12 cupcakes. I filled mine about 2/3 full.
*Depending on how full you fill the muffin tins, you could get anywhere from 8-12 cupcakes. I filled mine about 2/3 full.
Cookie Dough Frosting
makes enough to frost 10-12 cupcakes
- 1/2 cup (1 stick) butter, softened to room temp
- 3/4 cup brown sugar
- 1 tsp vanilla extract
- 1 1/4 cup flour
- 1/2 tsp salt
- 4 Tbsp milk (I used vanilla almond milk, but soy or regular would be fine)
- 1 cup mini chocolate chips
- In the bowl of a stand alone mixer with paddle attachment OR using an electric mixer, beat the butter and sugar until creamy.
- Add the vanilla and beat well. Stir in the flour and salt until doughy.
- Stir in the milk and beat until fluffy. Gently fold in chocolate chips + frost brownie cupcakes.
*I find these cupcakes are best served cold. I kept mine in the fridge. It also helped to avoid the cookie dough frosting from melting.
Flat Apple Pie

Photo Source: Food Network Website
It's no secret that I love Pioneer Woman's recipes and now I also really love her new show on Food Network. I've had my eye on her recipe for flat apple pies for a while and finally had the chance to make it. I love apple pie and usually use my mom's recipe, which is amazing but I was intrigued by this recipe. It was very easy to make (especially since I used refrigerated pie crust). One of my pies leaked all the liquid out which was pretty disappointing but tasted great nonetheless. Luckily I put the pies on rimmed baking sheets lined with non-stick foil. I highly recommend you do this or you could end up with a huge mess in your oven.
The recipe posted below is the original recipe by Pioneer Woman, however I did make a few adjustments which are written in red.
Flat Apple Pie
Ingredients
- 5 Granny Smith apples, peeled and sliced I used a combination of gala and fuji apples because I prefer them sweet to sour. I also cut my apples into small chunks because I prefer that to slices in pie.
- 1/2 cup firmly packed brown sugar
- 1/2 cup granulated sugar
- 2 tablespoons all-purpose flour
- 1/4 teaspoon salt
- Juice of 1/2 lemon I left this out because I forgot to buy a lemon ;-).
- 1 recipe Perfect Pie Crust, recipe follows I used Pillsbury refrigerated pie dough
- 6 tablespoons butter
Directions
Preheat the oven to 375 degrees F.
In large bowl, stir together the apples, brown sugar, granulated sugar, flour, salt and lemon juice. Set aside and see how long you can keep from sneaking a slice of apple.
With a rolling pin, begin rolling out the Perfect Pie Crusts into large circles. Roll the dough from the center outward. Be gentle and patient, it'll take a little time to get the dough completely rolled out.
If you think the bottom is really sticking to the surface below, use a nice, sharp spatula to loosen the dough and sprinkle some extra flour on top. Then flip it over to finish rolling. Remember to roll from the center in single, outward strokes, no back-and-forth rolling.
Again with a spatula, loosen and lift the dough and carefully place the circles on large baking sheets.
Place half the apple mixture on one crust and the other half on the other crust. Fold over the edges of each crust so that it covers 2 to 3 inches of the apple mixture. No need to be artistic - the more rustic the better. Dot the tops of the pies with chunks of the butter. I sprinkled the crust with cinnamon and sugar.
Bake until the filling is golden and bubbly, 30 to 40 minutes. If the crust appears to brown too quickly, cover the edges with aluminium foil for the remaining baking time.
Allow to cool slightly, then slice into wedges with a pizza cutter. Eat 'em on the go!
Perfect Pie Crust:
- 3 cups all-purpose flour, plus more for dusting
- 1 teaspoon salt
- 1 1/2 sticks cold butter
- 3/4 cup vegetable shortening
- 1 egg
- 5 tablespoons cold water
- 1 tablespoon distilled white vinegar
Combine the flour and salt in a large bowl. Add in the butter and shortening. Using a pastry cutter, gradually work the butter and shortening into the flour until the mixture resembles tiny pebbles. This step should take 3 or 4 minutes.
Lightly beat the egg with a fork, and then add it to the mixture. Next, add in the cold water and vinegar. Stir the mixture together until it's just combined, and then remove half the dough from the bowl. Yield: dough for 2 crusts.
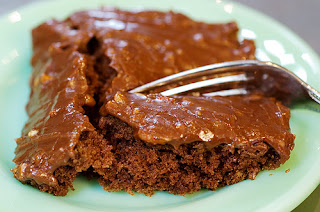
Texas Sheet Cake Brownies

I love Texas Sheet Cake so when I saw this recipe on Six Sister's Stuff I was eager to try it. I have to say that it was more cake-like than brownie-like, but either way it is scrumptious! It is really moist and not too sweet.

Texas Sheet Cake Brownies
Source: Six Sister's Stuff
For one 17 1/2 x 11" baking pan (48 brownies), you well need:
2 cups all-purpose flour
2 cups granulated sugar
1/2 cup (1 stick) butter or margarine
1/2 cup shortening
1 cup water
1/4 cup dark, unsweetened cocoa
1/2 cup buttermilk*
2 eggs
1 tsp baking soda
1 tsp vanilla
Frosting:
1/2 cup (1 stick) butter or margarine
2 Tbsp dark cocoa
1/4 cup milk
3 1/2 cups powdered sugar
1 tsp vanilla
*If you don't have buttermilk, no worries! Mix 1/2 cup milk with 2 tsp vinegar or lemon juice. Let sit for a minute before adding to other ingredients.
Preparation:
1. In a large mixing bowl, combine the flour and the sugar.
2. In heavy saucepan, combine butter, shortening, water, and cocoa. Stir and heat to boiling.
3. Pour boiling mixture over the flour and sugar in the bowl. Add the buttermilk, eggs, baking soda, and vanilla.
4. Mix well using a wooden spoon or high speed on an electric mixer.
5. Pour into a well greased 17 1/2x11" pan (like a cookie sheet).
6. Bake at 400 degrees for 15-18 minutes or until brownies test done in center.
7. While brownies bake, prepare the frosting. In a saucepan, combine the butter, cocoa, and milk. Heat to boiling, stirring.
8. Mix in the powdered sugar and vanilla until frosting is smooth (you may have to whisk it).
9. Pour warm frosting over brownies as soon as you take them out of the oven. Let cool. Cut into 48 bars.
Optional: Sprinkle chopped pecans or peanuts on top of the frosting.
S'mores Mini Pies

One thing I really love about the seasons is the foods that go with them. Just as pumpkin makes you think of fall, s'mores scream summer!
Eating s'mores makes me so happy. I love the combination of chocolate, marshmallow and graham crackers. While a s'more in it's pure form is truly amazing, I really love to experiment with all of the different s'more recipes I see all over the web.
These little pies are amazing! They are crispy on the outside and chocolatey and gooey on the inside. Exactly how a s'more should be. They are best warm from the oven but they are also yummy at room temperature.
While these are definitely easy to make, they are a bit time consuming since you have to fill and fold one pie at a time. You may be tempted to add extra filling but don't! If you put in too much filling it will burst out of the pie as it bakes.
This is a recipe from Monster Mama, however the recipe below is my slightly adapted version.
I also want to add that I used this fun little gadget to cut my dough circles and fold over my little pies. But you can use anything with a circle shape to cut your dough. A glass works well.

S'mores Mini Pies
1 box Pillsbury refrigerated pie dough
Filling:
1/2 c marshmallow creme
2 tbsp cream cheese, soft
2 tbsp sugar
1/2 c choc chips
Crumb mix:
1/2 c graham crackers (about 8 cracker squares, finely crushed)
1/4 c sugar
3 tbsp butter, melted
Preheat oven to 400 degrees.
Mix together ingredients for crumb mix and set aside. Mix filling ingredients in a bowl.
Cut dough into circles using a round cookie cutter or glass. Brush both sides of dough circles with melted butter and dip in crumb mixture. Place a scant tablespoon of filling in center of each round. Fold dough in half and press with a fork to seal. Place on a cookie sheet and bake for 10-12 minutes until brown.
Funfetti Pound Cake

This recipe, from Mrs. Happy Homemaker was a big hit. It was super easy to make and was quite delicious. I am not usually a huge fan of boxed cake mix and canned frosting so I was a bit resistant but was pleasantly surprised. This is definitely a great way to doctor up a cake mix!
Funfetti Pound Cake
Source: Mrs. Happy Homemaker
- 1 box funfetti or rainbow chip cake mix
- 1 tub rainbow chip chip or funfetti icing
- 4 eggs
- 1/2 cup vegetable oil
- 1 1/3 cups water
S'mores Bars

S'more Cookie Bars
source: Baked to Perfection
1/2 cup butter, room temperature
1/4 cup brown sugar
1/2 cup sugar
1 large egg
1 tsp vanilla extract
1 1/3 cups all purpose flour
3/4 cup graham cracker crumbs (approximately 7 full graham crackers)
1 tsp baking powder
1/4 tsp salt
2 super-sized (5 oz.) dark chocolate bars (e.g. Hershey’s)
1 1/2 cups marshmallow creme/fluff (not melted marshmallows)
Preheat oven to 350°F. Grease an 8-inch square baking pan.
In a large bowl, cream together butter and sugar until light. Beat in egg and vanilla.
In a small bowl, whisk together flour, graham cracker crumbs, baking powder and salt. Add to butter mixture and mix at a low speed until combined.
Divide dough in half and press half of dough into an even layer on the bottom of the prepared pan. Place chocolate bars over dough. Two 5 oz. Hershey’s bars should fit perfectly side by side, but break the chocolate (if necessary) to get it to fit in a single layer no more than 1/4 inch thick. Spread marshmallow fluff evenly over the chocolate layer.
Place remaining dough in a single layer on top of the fluff. This is most easily done by putting the second half of the dough in a gallon size freezer bag. Use your palms to flatten it out, and then use scissors to cut down both long sides of the bag, so it will open up book-style. Open it up carefully, and the dough will stick on one side of the bag. Then place the bag, dough side down, on the other three layers. From there peel the bag up ad spread the dough where it is uneven.
Bake for 30 to 35 minutes, until lightly browned. Cool completely before cutting into bars
Makes 16 cookie bars
Fantasy Fudge

This is my favorite fudge recipe. It is so smooth and chocolatey and oh so delicious! This is a must have for your holiday cookie tray. Or just anytime you want a delicious chocolate treat. It freezes wonderfully so you can make it ahead and keep it in the freezer. Just be sure to wrap it well. I freeze mine wrapped in plastic wrap and then put those in a ziplock bag.
Fantasy Fudge
3 cups of sugar
3/4 cups butter
2/3 cup evaporated milk
1 (12 oz.) package semi-sweet chocolate chips
1 (7 oz.) jar marshmallow cream
1 tsp vanilla
1/2 cup chopped walnuts (if desired)
Combine sugar, butter and milk in a saucepan. Bring to a boil and boil for 5 minutes, stirring constantly. Remove from the heat and add chocolate chips, mixing until melted. Add marshmallow cream and mix until blended. Add vanilla and stir in nuts. Pour into a greased 9 x 13 in. pan. Refrigerate until firm then cut into squares.
Caramel Corn
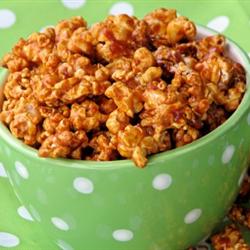
This is the first time I have made caramel corn. I love caramel corn but I guess I always thought it was difficult to make. Since it was on my winter break bucket list I decided I needed to give it a try.
I actually made two different recipes for caramel corn in one day. The first one was delicious but it wasn't quite what I was looking for. I was looking for crunchy and it was chewy and more gooey than what I wanted. It would be a great recipe for popcorn balls but just wasn't what I had in mind.
So I searched for recipes and found this one on allrecipes.com. One thing I love about that site is that you can read reviews of the recipes so you can kind of get an idea of what to expect before you make it. This recipe is definitely a winner! As I eat it I can hardly believe I made it!
Here is what you'll need.

Popcorn, butter, baking soda, salt, corn syrup (I used light), brown sugar and vanilla.

After you pop your corn you need to put it in a big roasting pan. I used this one and it was perfect! It's so big which made stirring it all up so much easier.
You'll put the popcorn in the oven while you make the caramel sauce.

Here's the caramel bubbling away. By the way, as tempting as it may be do not stick your finger in the caramel to taste it. It is hot and you will regret it.

Once the sauce is ready you pour it over the popcorn and stir until it is evenly coated. I used a spatula/spoon thingy from Pampered Chef that is great for this because the caramel didn't stick to it.
Next you'll put the pan in the oven for 45 minutes. Take it out and give it a stir every 10 minutes. Don't skip this step or it will burn and you will be very sad.
When it is done you need to spread it out on some foil sprayed with cooking spray to cool. Luckily it doesn't take long because you won't be able to wait.

Once it's cooled just put it into an airtight container.

Warning: This stuff is VERY addicting so be careful!
Classic Caramel Corn
Via allrecipes.com
Ingredients:
Cooking Spray
4 quarts popped popcorn
1 cup brown sugar
1/2 cup Karo® Light OR Dark Corn Syrup
1/2 cup butter OR margarine
1/2 teaspoon salt
1/2 teaspoon baking soda
Pure Vanilla Extract
Directions:
Spray large shallow roasting pan with cooking spray. Add popcorn and place in preheated 250 degree oven while preparing caramel.
Mix brown sugar, corn syrup, butter and salt in a heavy 2-quart saucepan. Stirring constantly, bring to a boil over medium heat. Boil 5 minutes without stirring. Remove from heat. Stir in baking soda and vanilla; mix well. Pour syrup over warm popcorn, stirring to coat evenly.
Bake for 45 minutes, stirring occasionally. Remove from oven and spread on foil that has been sprayed with cooking spray. Cool; break apart. Store in tightly covered container.
The BEST Homemeade Cinnamon Rolls

The first thing you do is make the dough. I use my bread machine on the dough cycle for this.


In a bowl, mix 1 cup packed brown sugar and 2 1/2 tbs cinnamon.


Here they are after being baked for about 25 minutes.

Clone of a Cinnabon
via allrecipes.com
Ingredients
- 1 cup warm milk (110 degrees F/45 degrees C)
- 2 eggs, room temperature
- 1/3 cup margarine, melted
- 4 1/2 cups bread flour
- 1 teaspoon salt
- 1/2 cup white sugar
- 2 1/2 teaspoons bread machine yeast
- 1 cup brown sugar, packed
- 2 1/2 tablespoons ground cinnamon
- 1/3 cup butter, softened
- 1 (3 ounce) package cream cheese, softened
- 1/4 cup butter, softened
- 1 1/2 cups confectioners' sugar
- 1/2 teaspoon vanilla extract
- 1/8 teaspoon salt
Directions
- Place ingredients in the pan of the bread machine in the order recommended by the manufacturer. Select dough cycle; press Start.
- After the dough has doubled in size turn it out onto a lightly floured surface, cover and let rest for 10 minutes. In a small bowl, combine brown sugar and cinnamon.
- Roll dough into a 16x21 inch rectangle. Spread dough with 1/3 cup butter and sprinkle evenly with sugar/cinnamon mixture. Roll up dough and cut into 12 rolls. Place rolls in a lightly greased 9x13 inch baking pan. Cover and let rise until nearly doubled, about 30 minutes. Meanwhile, preheat oven to 400 degrees F (200 degrees C).
- Bake rolls in preheated oven until golden brown, about 15 minutes. While rolls are baking, beat together cream cheese, 1/4 cup butter, confectioners' sugar, vanilla extract and salt. Spread frosting on warm rolls before serving.
Truffle Hot Chocolate Balls

I found the recipe for these truffle hot chocolate balls on Mel's Kitchen Cafe
I thought the idea was genius! I made them and I loooove them! When it comes to hot chocolate, there just is no comparison between homemade (made with milk) and the stuff in the packets you mix with water.
With these, I just make up a batch, roll the balls individually in plastic wrap, put the wrapped balls in a ziplock bag and keep them in the freezer. Then whenever we feel like having hot chocolate we just heat up 8 oz. of milk and drop in one of these little truffles. So easy and so incredibly rich and delicious!
Truffle Hot Chocolate Balls
Makes about 9-10 hot chocolate balls
INGREDIENTS:
12 ounces semisweet chocolate chips (about 2 cups)
1 cup heavy cream
1 tablespoon sugar (optional)
1/8 teaspoon salt
DIRECTIONS:
In a medium bowl, combine all of the ingredients. Microwave for one minute intervals, stirring often, until the mixture is combined and very smooth and silky. When you first start stirring, after the first minute or so, you’ll wonder if this mixture will ever come together. It will look grainy and messy but after it heats thoroughly and is whisked to combine, it will magically become beautifully smooth. Be careful not to overheat as the chocolate can seize. The trick is to stir often since the mixture will blend together even when it looks like the chocolate chips haven’t melted completely.
Let the mixture cool for about 10 minutes at room temperature. Cover the bowl with plastic wrap and place in the refrigerator until the ganache mixture is firm and scoopable, about 2-3 hours. Scoop out about 1/4-cup spoonfuls of the mixture and place them on a wax paper-lined baking sheet. My cookie scoop is about 1 1/2 tablespoons. I mounded two of the heaping cookie scoops full of ganache on top of each other to form one ball. Place the baking sheet in the refrigerator and let the mounds harden slightly, about 15-20 minutes. Roll the chilled mounds into balls and place on squares of plastic wrap (about 4 inches by 4 inches). Pull the sides of the plastic wrap over to cover the ball and place the balls in the freezer until ready to use.
To make the hot chocolate: pour 1 to 1 1/4 cups (depending on how rich you like your cocoa) milk into a microwave-safe mug. Microwave for about 2-2 1/2 minutes. Carefully drop one unwrapped truffle hot chocolate ball into the milk. Stir well until the chocolate is combined with the milk. Serve warm!
Cookie Balls

The three varieties I made were vanilla caramel, chocolate mint and gingersnap. I forgot to take pictures, which is a shame because the peppermint ones came out really pretty. These pictures came from the web.

Vanilla Caramel Cookie Balls
70 vanilla wafers, crushed
8 oz. cream cheese, softened
1 pkg. melting chocolate (I like the Wilton candy melts but you can also use chocolate chips)
Sprinkles
Mix the crushed cookies and cream cheese in a large bowl. Roll into 1-in. balls and place on a cookie sheet. Freeze for 10 minutes. Dip in melted chocolate and top with sprinkles. Refrigerate or freeze until firm.
Chocolate Mint Cookie Balls
1 pkg. mint Oreos, crushed
6 oz. (3/4 pkg) cream cheese, softened
white chocolate, melted (I like Wilton candy melts, but you can also use white chocolate chips)
Crushed candy canes
Mix crushed oreos and cream cheese in a large bowl. Roll into 1-in. balls and place on a cookie sheet. Freeze for 10 minutes. Dip in melted white chocolate and top with crushed candy canes. Refrigerate or freeze until firm.
Gingersnap Cookie Balls
1 lb. gingersnap cookies, crushed
8 oz. cream cheese, softened
powdered sugar
Mix crushed cookies and cream cheese in a large bowl. Roll into 1-in. balls and place on a cookie sheet. Freeze for 10 minutes. Roll in powdered sugar.
Butter Cookies

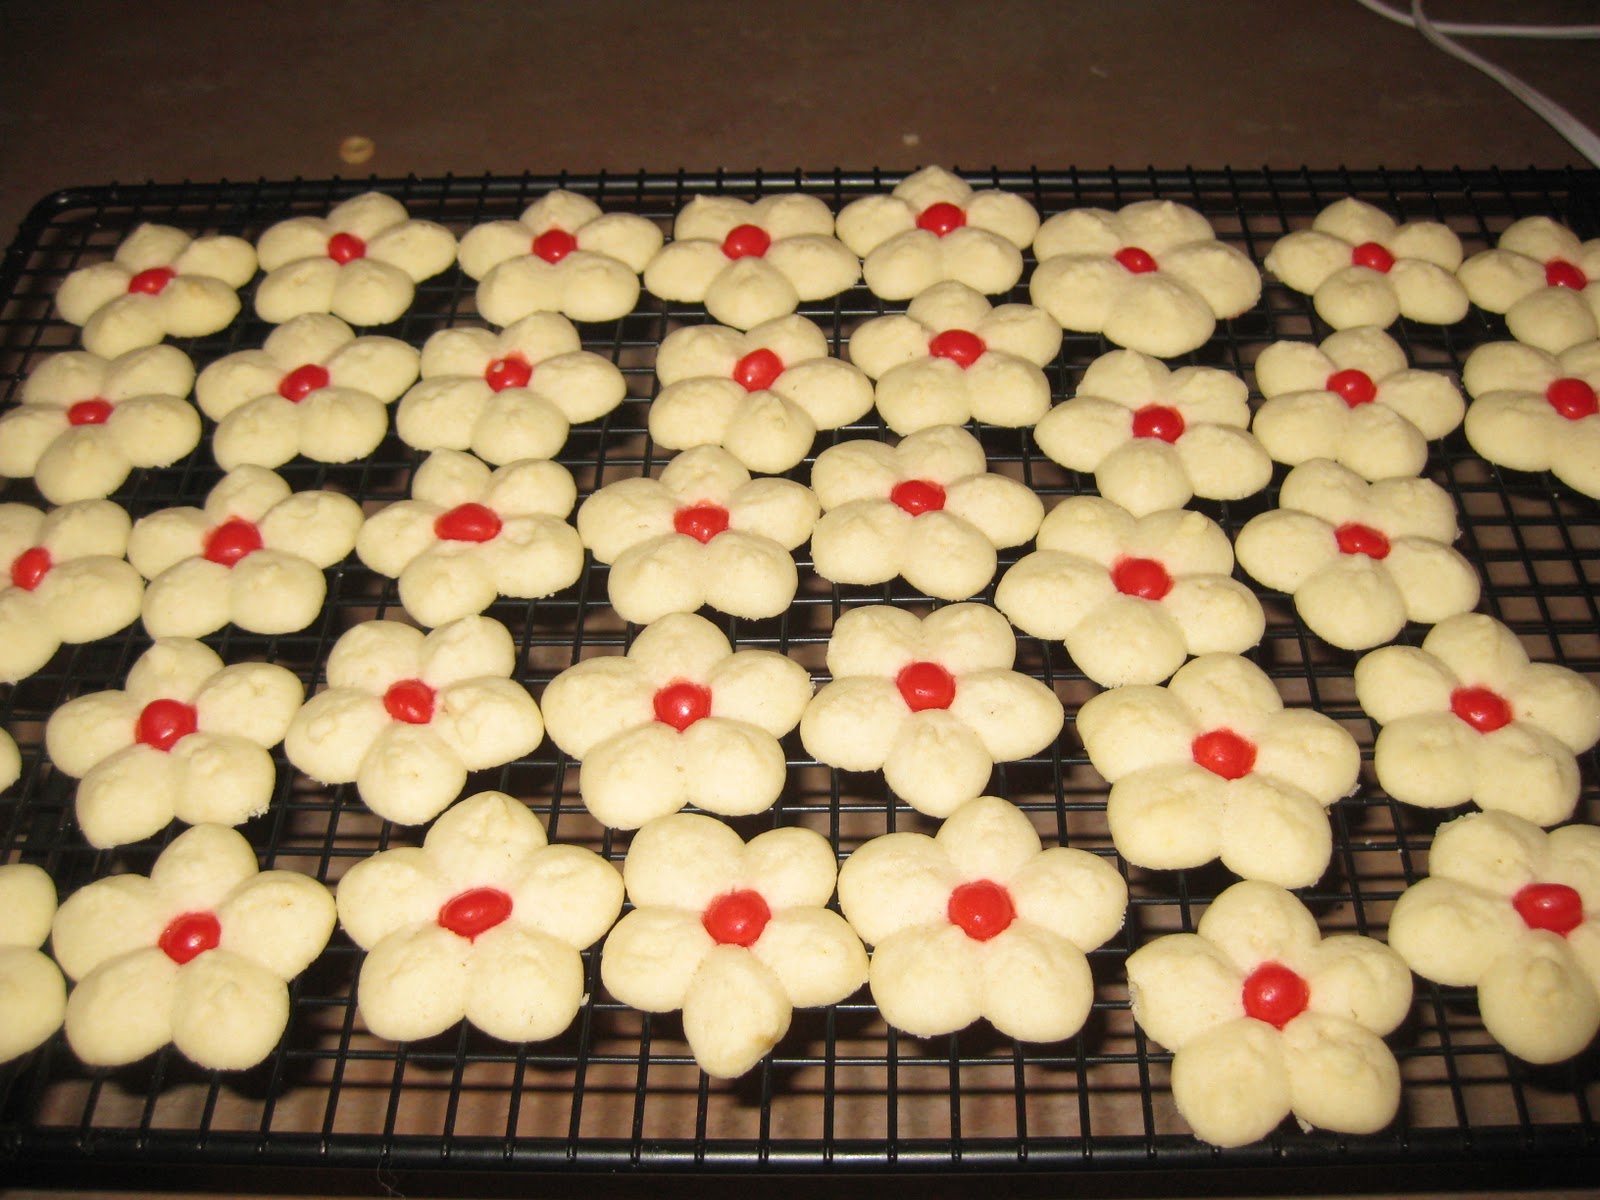
Some people call these Spritz Cookies. We've always just called them Butter Cookies. They are so light and delicate and so delicious! You can really decorate them any way you want. Some people add food coloring to the dough. Eating green cookies seems weird to me so I choose to just leave them white and top with colored sugar and red hots.

You will need a cookie press to make these. There are lots of different kinds out there but my favorite is this one by Wilton. It does take a little bit of practice and patience, but once you get the hang of it you'll have tons of cute little cookies in no time!

These cookies freeze perfectly which means you can start baking in advance. Just wrap them carefully because they break easily.
Butter Cookies
2 sticks butter, softened
1 egg
2 1/3 cup flour
1/2 cup sugar
1 tsp almond extract
Cream butter. Gradually add sugar and beat until light and fluffy. Beat in egg and almond extract. Gradually blend in flour. Fill cookie press with dough. Form desired shapes on ungreased cookie sheets. Bake at 350 for 8-10 minutes.
Yield: about 7 dozen
Chocolate Chip Banana Bread

Because the weather is so Fall like, because it's Friday night (who doesn't love that?), because I need to bring something to crochet club tomorrow, because I had some bananas rotting (err...I mean ripening) on the counter, I decided it was the perfect time to make some of my FAVORITE chocolate chip banana bread.
This recipe is really the only one for banana bread I have ever made. It was the first one I tried and I love it so much that I really don't see the need to try any others. The recipe comes from Starbucks of all places! Anyone who knows me would not be surprised by this little bit of information. The original recipe calls for walnuts, and you can certainly add those if you like that sort of thing. I personally do not like nuts in any baked good except brownies and fudge so I left the nuts out and added chocolate chips instead. I also sometimes sprinkle some cinnamon/sugar on top before I put it in the oven (and then a little more after it comes out for good measure).
I often double the recipe and make it in two pans. You can freeze the extra one for later or fill someone's bucket (sorry, teacher term) and give it away!
One last note, this recipe calls for 2 Tbs. of buttermilk. Since I don't keep buttermilk on hand, I make my own. All you have to do to make your own buttermilk is put a tablespoon of white vinegar in a measuring cup and fill it to one cup with milk. Let it sit for about 5-10 minutes to sour. Since you need only 2 tbs. you can adjust the amounts of vinegar and milk to make the amount you want. Easy and cheap!
I hope you try this recipe and I hope you love it as much as I do!
Chocolate Chip Banana Bread
2 cups flour
1 tsp. baking soda
1/4 tsp. salt
1 egg
1 1/8 cup sugar
1/2 cup vegetable oil
2 tbs. buttermilk
1/2 tsp vanilla
3 ripe medium-large bananas (mashed)
1/2 cup + 1/3 cup chocolate chips
Preheat the oven to 325 degrees. Grease a 9x5x3 loaf pan and dust with flour. Blend together the flour, baking soda and salt and set aside. Mix together the egg, sugar and vegetable oil until combined. Add the flour mixture and when blended add the buttermilk, vanilla and mashed bananas and mix until combined. Fold in chocolate chips and pour into prepared pan. Top batter with remaining 1/3 cup chocolate chips. Bake for 45 to 60 minutes, until a toothpick inserted in the center comes out clean. Cool for 10 minutes on a wire rack before removing from pan.
Chocolate Sheet Cake
Ree Drummond's blog, a.k.a. The Pioneer Woman was one of the first food blogs I discovered. Her blog has been around for a long time and I have been reading it for a long time. Not only is she hilarious, but her recipes are so good!
When her first cookbook came out in 2009 I had to have it. Then when I found out she was going to be at a local bookstore I had to be there! It was so exciting to see her in person!
This cake is to. die. for. It is moist and chocolaty and I could seriously eat my way out of a tub of the frosting! This isn't exactly what I would consider a "quick" cake to make because there are quite a few steps involved, but boy is it worth it!
I definitely think you should make this cake for your next gathering (or your next chocolate craving). Your family and friends will bow down at your feet and will love you forever!
The Best Chocolate Sheet Cake. Ever.
via The Pioneer Woman
Ingredients
- FOR THE CAKE:
- 2 cups Flour
- 2 cups Sugar
- 1/4 teaspoon Salt
- 4 Tablespoons (heaping) Cocoa
- 2 sticks Butter
- 1 cup Boiling Water
- 1/2 cup Buttermilk
- 2 whole Beaten Eggs
- 1 teaspoon Baking Soda
- 1 teaspoon Vanilla
- _____
- FOR FROSTING:
- 1/2 cup Finely Chopped Pecans
- 1-3/4 stick Butter
- 4 Tablespoons (heaping) Cocoa
- 6 Tablespoons Milk
- 1 teaspoon Vanilla
- 1 pound (minus 1/2 Cup) Powdered Sugar
Preparation Instructions
Note: I use an 18x13 sheet cake pan.
In a mixing bowl, combine flour, sugar, and salt.
In a saucepan, melt butter. Add cocoa. Stir together.
Add boiling water, allow mixture to boil for 30 seconds, then turn off heat. Pour over flour mixture, and stir lightly to cool.
In a measuring cup, pour the buttermilk and add beaten eggs, baking soda, and vanilla. Stir buttermilk mixture into butter/chocolate mixture. Pour into sheet cake pan and bake at 350-degrees for 20 minutes.
While cake is baking, make the icing. Chop pecans finely. Melt butter in a saucepan. Add cocoa, stir to combine, then turn off heat. Add the milk, vanilla, and powdered sugar. Stir together. Add the pecans, stir together, and pour over warm cake.
The Greatest Pumpkin Bars. Ever.

I pretty much love anything made with pumpkin. Once there is the tiniest sign of Fall (which is hard to spot in AZ) I start to crave pumpkin treats and pumpkin bars will definitely do the trick!
I have tried many different recipes for pumpkin bars and have found them all to be pretty similar.
Until the day I tried the ones from Magnolia Bakery. From Magnolia Bakery's cookbook that is, which is written by Allysa Torey and Jennifer Appel. They were the original owners of the famous Magnolia Bakery. Magnolia now has new owners but I'm sure it is just as delicious as ever and if I ever get to New York I will definitely be stopping by!

What makes these pumpkin bars different is they are so wonderfully moist! And the homemade cream cheese frosting really puts them over the edge. I definitely recommend you try this recipe!
Pumpkin Bars with Cream Cheese Icing
Via The Complete Magnolia Bakery Cookbook
Bars:
1 1/2 cups all purpose flour
1 1/2 tsp baking powder
1 1/2 tsp cinnamon
1 tsp baking soda
1/4 tsp salt
1 1/4 cups canned pumpkin puree
1 1/4 cups sugar
3/4 cup vegetable oil
3 large eggs at room temperature
1/2 cup coarsely chopped toasted pecans (I omit these)
Preheat oven to 350 degrees. Grease and lightly flour a 13 x 9-inch baking pan. In a small bowl, sift together the flour, baking powder, cinnamon, baking soda and salt. Set aside.
In a large bowl, beat together the pumpkin, sugar, oil, and eggs on medium speed until smooth, about 3 minutes. Add the dry ingredients and mix thoroughly. Stir in the pecans (if using). Pour the batter into the prepared pan. Bake for 25-30 minutes, or until cake tester inserted in the center of the pan comes out clean.
Remove from oven and allow to cool completely before icing the top with cream cheese icing. Garnish with pecans as desired.
Icing:
8 oz. cream cheese, softened and cut into small pieces
3 tbs butter, softened and cut into small pieces
3/4 tsp vanilla extract
2 1/2 cups sifted confectioner's sugar
In a large bowl, beat the cream cheese and butter on medium speed until smooth, about 3 minutes. Add the vanilla and beat well. Gradually add the sugar, 1 cup at a time, beating continuously until smooth and creamy. Cover and refrigerate icing for 2 to 3 hours, but no longer, to thicken before using.
Chocolate Chip Oatmeal Cookies

These cookies are a variation of Vanilla Pudding Cookies, which are amazing! Just like their plain chocolate chip cousins, the pudding mix makes these cookies wonderfully soft and moist! And the best part? Since they are made with oatmeal, I am pretty sure they count as breakfast! :).
Chocolate Chip Oatmeal Cookies
Via Taste of Home
1 cup butter, softened
3/4 cup sugar
3/4 cup packed brown sugar
2 eggs
1 tsp vanilla extract
3 cups quick cooking oats
1-1/2 cups flour
1 pkg (3.4 oz) instant vanilla pudding mix
1 tsp baking soda
1 tsp salt
2 cups (12 oz.) semisweet chocolate chips
1 cup chopped nuts (I omitted these)
In a large bowl, cream butter and sugars until light and fluffy. Beat in eggs and vanilla. Combine the oats, flour, pudding mix, baking soda and salt; gradually add to creamed mixture and mix well. Stir in chocolate chips and nuts.
Drop by rounded teaspoonfuls 2 in. apart onto ungreased baking sheets. Bake at 375 degrees for 10-12 minutes or until lightly browned. Remove to wire racks.
Yield: about 7 dozen
Slow Cooker Chocolate Cobbler

I found and pinned this recipe a while back and have had it on my "to make" list for quite some time. Finally, today I got around to making it!
I decided to go all out on dinner tonight. We had steak, twice baked potatoes, fresh corn on the cob and chocolate cobbler for dessert. It was A-MA-ZING!!
This recipe uses very simple ingredients that you probably already have in the house. It's very simple to make, you just throw it all into the slow cooker and a few hours later you have a chocolate cake with a delicious fudgy sauce. It's literally a crock pot full of heaven!
I recommend having this cake with a scoop (or two) of vanilla ice cream but it would still be delicious by itself. The nice thing about this cake is that it has wonderful chocolate flavor but it's not overly sweet or rich. It really is my idea of the perfect dessert.
Chocolate Cobbler in the Slow Cooker
via Eat At Home
Ingredients
1 cup flour
2 tsp. baking powder
1/4 tsp. salt
3 Tbs. cocoa
3/4 cup white sugar
1/2 cup milk
1/3 cup butter, melted
1 1/2 tsp. vanilla
1/2 cup white sugar
1/2 cup brown sugar
4 Tbs. cocoa
1 1/2 cups hot water
Instructions
Spray the inside of the slow cooker crock with cooking spray.
In a large bowl, stir together flour, baking powder, salt, 3 Tbs. cocoa and 3/4 cup white sugar. Stir milk, melted butter and vanilla into the flour mixture until smooth. Pour into the greased crock.
In a small bowl, combine the rest of the white sugar, brown sugar and cocoa. Sprinkle over the top of the batter in the crock.
Pour hot water over the top of ingredients in the slow cooker. Do not stir! Put the lid on the slow cooker and cook on low for 3-4 hours. Remove the lid and let stand for several minutes before serving.
At first, it will be a bit too liquidy, but should thicken up after several minutes.
Apple Pie

This is my mom's recipe for apple pie and it truly is my all time favorite. It is so simple. Just apples and a few spices but it is heavenly! Especially when topped with a scoop of vanilla ice cream.
Apple Pie
1 pkg deep dish frozen pie shell
7-8 apples (I like to use Rome or Gala), chopped or sliced, whichever you prefer
3/4 cups sugar
2 tbs. flour
1 tsp cinnamon
dash nutmeg
dash salt
2 tbs butter
Preheat oven to 400. Combine sugar, flour, spices and salt. Mix with apples. Put apple mixture into crust. Dot with butter and place second crust on top. Brush top with milk and sprinkle with cinnamon and sugar or just plain sugar. Put pie on a rimmed cookie sheet and bake for 50 minutes. If the crust gets too brown at the end you can cover with foil.
Chocolate Chip Cookie Delight

Chocolate Chip Cookie Delight
via Dainty Chef via Taste of Home
What you'll need:
1 tube (16-1/2 ounces) refrigerated chocolate chip cookie dough
1 package (8 ounces) cream cheese, softened
1 cup confectioners' sugar
1 carton (12 ounces) frozen whipped topping, thawed, divided
3 cups cold milk
1 package (3.9 ounces) instant chocolate pudding mix
1 package (3.4 ounces) instant vanilla pudding mix
Chopped nuts and chocolate curls, optional
What you'll do:
Let cookie dough stand at room temperature for 5-10 minutes to soften. Press into an ungreased 13-in. x 9-in. baking pan. Bake at 350° for 14-16 minutes or until golden brown. Cool on a wire rack. In a large bowl, beat cream cheese and confectioners' sugar until smooth. Fold in 1-3/4 cups whipped topping. Spread over crust. In a large bowl, whisk milk and pudding mixes for 2 minutes; let stand for 2 minutes or until soft-set. Spread over cream cheese layer. Top with remaining whipped topping. Sprinkle with nuts and chocolate curls if desired.
Cover and refrigerate for 8 hours or overnight until firm
Graham Cracker S'mores Candy

S'mores Cracker Candy
12 sheets of graham crackers
3/4 cup butter
3/4 cup brown sugar
3 cups mini marshmallows
4 Hershey bars, broken into pieces
1 cup milk chocolate chips
Preheat oven to 350°F. Line a 15x10x1-inch jelly roll pan with aluminum foil, leaving a 1-inch overhang over the ends, and spray foil with cooking spray. Line graham crackers up on the foil so that the sides are touching.
In a medium saucepan, melt butter and brown sugar over medium heat, stirring constantly, until smooth and mixture comes just to a boil (about 4-6 minutes). Remove from heat and pour evenly over crackers. Bake 5 to 6 minutes, or until bubbly.
Remove pan from oven and immediately sprinkle mini marshmallows, chocolate bar pieces, and chocolate chips over the crackers.
Return pan to oven for another 2-3 minutes, or until marshmallows begin to soften and puff up.
Cool completely. Lift from pan using foil edges; cut into bars and enjoy!
Easy S'mores Bars

I have a little bit of a s'mores obsession so when I saw this recipe from Real Mom Kitchen I knew I had to make them STAT!! Like literally, go to the store the same day to get the ingredients to make them, stat!
And they did not disappoint! Wow. All I can say is....wow. These babies have got me speechless! They are truly magical. And amazing and wonderful!!
The Stars of the Show:

Sugar cookie mix, graham cracker crumbs, marshmallows, chocolate chips and butter.
Now don't be a hater and please don't leave me comments about calorie counts. I am fully aware that this is not a healthy, low calorie recipe!
BUT...these bars are really rich. A little goes a loooong way and you can easily get 24 (or more) servings out of this recipe if you cut them into small squares.
First you need to line your baking pan with foil. Have you guys seen this trick where you mold your foil to the outside of the pan first?

Then flip it over and it fits perfectly inside! I used Reynold's Non-Stick foil but regular foil would be fine too.


Mix up the graham cracker crumbs and the cookie mix. Melt the butter and add it to the cookie/graham cracker mixture. Stir to form a dough.

Press the dough into the pan and bake.

Once the cookie base is done baking, take it out and immediately pour chocolate chips on top.

Let the chocolate chips sit for a few minutes and then begin to spread them across the top. Even though they don't look melted they are!


Sprinkle the marshmallows on top then pop under the broiler until the marshmallows are puffed and golden.

You will definitely want to babysit these because they brown FAST!

Enjoy a little piece of heaven on Earth!
Easy S'mores Bars
Via Real Mom Kitchen
1 pouch (1 lb 1.5 oz) Betty Crocker® sugar cookie mix
1 cup graham cracker crumbs
1 cup butter, melted
3 cups milk chocolate chips (18 oz)
4 1/2 cups miniature marshmallows
Heat oven to 375°F and line a 13×9 inch pan with foil.
In large bowl, stir the cookie mix and graham cracker crumbs together. Then stir in melted butter until soft dough forms. Press the dough evenly into your foil lined 13×9 inch pan.
Bake for 18 to 20 minutes or until set, I made sure it passed the toothpick test. Immediately sprinkle chocolate chips over crust. Let stand for a few minutes until chocolate begins to melt. Spread the melted chocolate evenly over crust.
Sprinkle marshmallows over melted chocolate. Broil on the center rack of your oven until marshmallows are puffed and toasted to a golden brown. Watch closely because the marshmallows will brown quickly, it can take less than a minute. Cool a minimum of 10 minutes. Carefully remove from the pan using the foil. Cut into bars using a knife sprayed with non-stick cooking spray. They are best served warm but are still excellent at room temp. Store any remaining bars tightly covered. Makes 12-16 bars.
Happy National Cheesecake Day!!

In honor of National Cheesecake Day I am posting the recipe for my favorite cheesecake!!
This is an old family recipe passed down from my maternal grandmother. It has been made by my mom for many, many years and now, of course I make it too!
Anyone who has ever tried this cheesecake falls in love with it. And for good reason! It is not like your average thick, dense cheesecakes. It's got a very smooth, creamy texture as opposed to the grainy one I've noticed in some recipes. This recipe really couldn't be easier to make, but I feel compelled to warn you that you'll need to beat the mixture for 15 minutes. I know. Pick your jaw up off the floor. It is a long time, but it really is what gives this cheesecake it's velvety smooth texture. And if you have one of these babies it's a cinch!

My hubby surprised me with this last Christmas. Isn't she pretty?? It's definitely one of the best gifts I've ever received and honestly don't know how I lived for so long without it!
Similar to my opposition to cottage cheese in lasagna, I am strongly against sour cream in cheesecake. I just do not enjoy the flavor sour cream gives to cheesecake. In fact, as soon as I see sour cream listed in the ingredients for a cheesecake recipe I turn the page. I have nothing against sour cream, I just don't like it in cheesecake! So needless to say, there is no sour cream in MY cheesecake!
My daughter actually loves this cheesecake and every year asks for it to be her birthday cake!
The Stars of the Show:

Cream cheese. Surprised?? I didn't think so.

A graham cracker crust. Back in the day my grandma and mom would make the crust from scratch. Because I really don't think it makes that much of a difference in the end result, I take the help from the little elves and use a pre-made crust.

Cherry pie filling. I have a secret. I don't like cherries. I don't like cherry pie filling either. But I DO like cherry flavored things. And I can't make this cheesecake without the cherry filling on top. I usually just scrape off the cherries, leaving behind the yummy cherry flavored syrup.
You also need sugar, eggs and vanilla.
You definitely need to celebrate this special day with this amazing recipe! You won't regret it!
Cheesecake
Source: Family recipe
2 eggs
2 8-oz. packages cream cheese, softened to room temperature
3/4 cup sugar
1 tsp vanilla
10" graham cracker crust
1 can cherry pie filling (or blueberry)
Preheat oven to 350 degrees. Put first four ingredients (except pie crust) into bowl of mixer or large bowl. Beat on low speed for 15 minutes, scraping down the bowl occasionally. Pour into crust. Bake 25 minutes until the top just barely begins to brown.
Cool completely. Top with fruit topping. Refrigerate overnight.
Chocolate Eclair Cake

I've had this recipe for a long long time. It is really easy and super yummy! My kind of dessert!

The Stars of the Show: Milk, graham crackers, cool whip, vanilla pudding and chocolate frosting.

All you do is mix up the pudding, milk and cool whip, get your graham crackers and get your layer on!

Once it's all layered, put the frosting on and spread it around. And that's it! Oh, well it needs to be refrigerated for a while before you can eat it to soften the graham crackers. That is the only bummer part of this recipe!
Chocolate Eclair Cake
via allrecipes.com
1 box graham crackers
2 small pkgs. vanilla instant pudding
3 cups milk
1 can chocolate frosting
1 8 oz. cool whip
Make pudding with only 3 cups of milk. Fold into Cool Whip. Layer bottom of 9 x 13 pans with graham crackers. Top with 1/2 pudding mixture. Another layer of crackers, another layer of pudding mixture. Finally, top with another layer of crackers. Microwave frosting and pour evenly over pan for that smooth look. Best if made the night before so the crackers get soft.
Printable Recipe
Printable Recipe
Cake Batter Rice Krispy Treats
Today's recipe comes from Kaitlin from Kaitlin in the Kitchen.
Cake Batter Rice Krispie Treats seem to be all the rage in food blog land because I have seen them on many of the blogs I have visited. We love Rice Krispie Treats (who doesn't??) so I knew I had to give this recipe a try.
I have to say that the addition of cake mix really does give a regular Rice Krispie Treat a nice new flavor. And sprinkles instantly make everything more fun!!
The Stars of the Show:

Rice Krispies, marshmallows, white cake mix, butter, rainbow sprinkles.

The method for making Cake Batter Rice Krispie Treats is similar to making regular Rice Krispie Treats. Start with melting the butter in a pot (I sure wish I had a large non-stick pot for this). Once the butter is melted throw in the marshmallows.

Keep stirring as you melt the marshmallows. You do not want them to burn or stick to the pan.

Once the marshmallows are melted add in the cake mix and stir until it is dissolved.

At this point, I took the pot off the heat before adding the sprinkles. I didn't want the sprinkles to melt and turn my Rice Krispie Treats a funky color :-).

Put Rice Krispie mix into a greased pan. I always spray my hands with cooking spray before doing this so that I can pat them down evenly without it all sticking to my hands. I added some extra sprinkles to the top. Pretty!
I really hope you give this new take on an old treat a try! You won't be disappointed!!
Cake Batter Rice Krispie Treats
Via Kaitlin in the Kitchen
Ingredients:
3 Tablespoons Butter
1 10 oz. Package of Regular Marshmallows or 4 Cups Miniature Marshmallows
6 Cup Rice Krispies
1/3 Cup White Cake Mix
1/3 Cup Rainbow Sprinkles
Directions:
3 Tablespoons Butter
1 10 oz. Package of Regular Marshmallows or 4 Cups Miniature Marshmallows
6 Cup Rice Krispies
1/3 Cup White Cake Mix
1/3 Cup Rainbow Sprinkles
Directions:
Melt butter or margarine in a large sauce pan, add marshmallows and constantly stir until they are melted, then add in your cake mix and stir until it is dissolved in the marshmallows. Add your Rice Krispies and your sprinkles and mix until all of the cereal is evenly coated in marshmallow. Transfer mixture into a greased casserole dish and let cool before cutting.

Look at these little cuties!! The recipe for these came from Cookies and Cups, a beautiful blog full of yummy sweet treats! These peanut butter cookie cups have got to be one of the most delicious treats I have ever made. And to make it even better, they were so easy! They are soft and so peanut buttery delicious!


 Since this is the first official recipe I am posting here I'd like to warn you that I am NOT a good photographer and my kitchen has the worst lighting! Because I believe we eat with our eyes, I want to try to add as many pictures of the recipe as I can but please don't pay attention to (or judge me) on my bad photo skills :).
These cookies seem to be all the rage in blog-land (I can't even remember where I got this recipe) so I decided to give them a try. We are BIG chocolate chip cookie fans in my house and this is by far my new favorite recipe for this all-time favorite. I am not against convenience foods but taking the time to make chocolate chip cookies from scratch is definitely worth it. They just taste so much better than pre-made cookie dough in my opinion.
I have actually made these cookies three times since copying down the recipe a few weeks ago. The first two times I made them as the recipe states and used vanilla pudding mix. When I made them for this post I decided to try it using chocolate pudding. Whichever flavor you use they will be YUMMY! The pudding mix seems a little odd but you can't taste it in the cookies and it makes the cookies so incredibly soft!

 The first thing you need to do is combine your dry ingredients in a separate bowl. Here you can see my cute little helper, Muffin Man helping me. It's kind of ironic (or maybe not) that both my kids' nicknames are foods.
 Next you cream together your softened (or squishy as Muffin Man calls it) butter with the sugars, add the pudding mix, eggs and vanilla. I usually scrape the bowl a few times during this process to make sure it's all incorporated. Once it's all creamed you add your flour mixture and once that is all combined you stir in your chocolate chips.
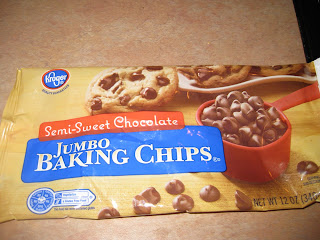 I found these jumbo chocolate chips at the store and love using them in chocolate chip cookies!

Once the chips are stirred in you are going to place them onto a cookie sheet. I like to use a scoop for this because it makes them all the same size. Uniformity makes me happy. But it also ensures the cookies all bake at the same rate.

 Here is what they look like when they are done. I always like to slightly under-cook my cookies because we like them soft. All ovens are different but in my oven these cookies take 10 minutes. After I take them out of the oven I leave them on the cookie sheet for a few minutes before I remove them to a cooling rack. Little brown gobs of chocolaty deliciousness!
 These are the chocolate version. I think I'll be enjoying one or two (or four or five) of these babies with some iced coffee after dinner tonight!
1 cup butter, softened
3/4 cup brown sugar
1/4 cup granulated sugar
3.4 oz pkg vanilla instant pudding mix
2 eggs
1 tsp vanilla
2 cups semi-sweet chocolate chips
Preheat oven to 350F. Combine flour, baking soda and salt in a medium bowl and set aside.
In a large bowl, beat together the butter and sugars until light and fluffy. Scrape down the bowl and beat in the pudding mix. Scrape the bowl again and add the eggs one at a time, beating well after each. Add vanilla. Add half of the dry ingredients and mix just to combine. Scrape down the bowl and add the rest of the dry ingredients. Mix until fully incorporated. Stir in the chocolate chips.
Using a tablespoon size scoop, place 2 1/2 inches apart on baking sheets and bake 10-12 minutes, until slightly golden and set. Let cookies cool on sheet for 3 minutes, then transfer to racks to cool completely.
Peanut Butter Cookie Cups
Look at these little cuties!! The recipe for these came from Cookies and Cups, a beautiful blog full of yummy sweet treats! These peanut butter cookie cups have got to be one of the most delicious treats I have ever made. And to make it even better, they were so easy! They are soft and so peanut buttery delicious!
All you really need to make these is a package of peanut butter cookie mix (plus ingredients to make the dough)...
and some Reese's Peanut Butter Cups
The only thing I did differently was to drizzle melted chocolate on top instead of using the white chocolate buttercream she used in her recipe. I put a handful of chocolate chips in a small ziplock baggie, put the baggie in a measuring cup to keep it upright and microwaved it for 15-30 seconds at a time until it was nice and smooth. Then I cut a little hole in the corner of the baggie and drizzled away! Super easy way to make a pastry bag!
I honestly did not miss the buttercream on top. These babies are pretty sweet! I'd like to try to make a mini version of these using mini Reese's Peanut Butter Cups and a mini muffin tin.
Stay tuned for that!
Peanut Butter Cookie Cups & White Chocolate Buttercream
via Cookies and Cups
1 package peanut butter cookie mix
12 Reese's Cups
Make cookie dough according to directions on package. Line muffin pan with cupcake liners and place unwrapped PB cup at the bottom. Scoop approx 2 Tablespoons dough on top of PB cup it will yield approx 12 cookie cups.
Bake at 325 for approx 20-25 minutes until cookie is set.
White Chocolate Buttercream
(will frost 36 cupcakes)
18 oz white chocolate chips (about a 12 oz bag and a half)
1/2 cup milk, divided in half
1 cup vegetable shortening
1 cup butter (2 sticks)
2 teaspoons vanilla extract
8 cups sifted powdered sugar (approx 2 pounds)
Cream butter and shortening with mixer. Add vanilla. Gradually beat in sugar, scraping the sides, Icing will appear dry when all sugar is in. Add 1/4 cup milk. Beat until fluffy on medium, approx 30 seconds.
In microwave safe bowl add white chocolate chips and remaining 1/4 cup milk. Microwave on 50% power 1 minute, then stir, continuing with 30 intervals until chocolate is just melted. If there are a few lumps, just give it a good stir until they lumps melt, DO NOT overheat, you will ruin the chocolate. When chocolate is melted, add to the prepared buttercream. Beat in on medium until fully incorporated. Let cool for 15-20 minutes, then pipe on.


If you ever have extra tortillas laying around making cinnamon chips is a really yummy way to use them up!
I made quesadillas the other night and I had a few tortillas leftover so I decided to whip up some of these babies.
The Stars of the Show:

Tortillas, cinnamon/sugar and butter.

Spread melted butter on tortillas.

Sprinkle with cinnamon/sugar. You can just do one side of the tortilla if you want, but since I don't like one-sided-tasting food I do both sides.

Cut into triangles and put onto a baking sheet.

Bake in the oven at 350 degrees for 10-15 minutes until brown.
These are delicious plain, with fruit dip or you can use them to make these fantastic Strawberry & Nachos!
Vanilla Pudding Cookies

These cookies seem to be all the rage in blog-land (I can't even remember where I got this recipe) so I decided to give them a try. We are BIG chocolate chip cookie fans in my house and this is by far my new favorite recipe for this all-time favorite. I am not against convenience foods but taking the time to make chocolate chip cookies from scratch is definitely worth it. They just taste so much better than pre-made cookie dough in my opinion.
I have actually made these cookies three times since copying down the recipe a few weeks ago. The first two times I made them as the recipe states and used vanilla pudding mix. When I made them for this post I decided to try it using chocolate pudding. Whichever flavor you use they will be YUMMY! The pudding mix seems a little odd but you can't taste it in the cookies and it makes the cookies so incredibly soft!

The Stars of the Show...a.k.a. the ingredients
You will need flour, baking soda, salt, butter, brown sugar, white sugar, instant pudding mix (this picture shows vanilla and chocolate but you use one or the other, not both), eggs, vanilla and chocolate chips.


Once the chips are stirred in you are going to place them onto a cookie sheet. I like to use a scoop for this because it makes them all the same size. Uniformity makes me happy. But it also ensures the cookies all bake at the same rate.


Vanilla Pudding Cookies
2 1/4 cups flour
1 tsp baking soda
1/2 tsp salt1 cup butter, softened
3/4 cup brown sugar
1/4 cup granulated sugar
3.4 oz pkg vanilla instant pudding mix
2 eggs
1 tsp vanilla
2 cups semi-sweet chocolate chips
Preheat oven to 350F. Combine flour, baking soda and salt in a medium bowl and set aside.
In a large bowl, beat together the butter and sugars until light and fluffy. Scrape down the bowl and beat in the pudding mix. Scrape the bowl again and add the eggs one at a time, beating well after each. Add vanilla. Add half of the dry ingredients and mix just to combine. Scrape down the bowl and add the rest of the dry ingredients. Mix until fully incorporated. Stir in the chocolate chips.
Using a tablespoon size scoop, place 2 1/2 inches apart on baking sheets and bake 10-12 minutes, until slightly golden and set. Let cookies cool on sheet for 3 minutes, then transfer to racks to cool completely.